Microsoft Teams: Intune Deployment - Custom Backgrounds
Using PowerShell you can deploy to your tenant background images available for Microsoft Teams.


For many months I've been try to figure out the best way to deploy background images for Teams to all users in our Tenant. I've tried a local deployment using SCCM but with how 2020 and 2021 have been going, we have been working from home which has made some deployments within SCCM very unreliable. With a transition to Intune I ended up doing some more google searching and ultimately came across a script that I've since modified to allow what I believe to be a better way of deploy background images. This method could also be used for deploying anything that requires a PowerShell script to distribute your changes. The following steps will help you in getting a deployment that has worked successfully every time.
Background
When it comes to adding a new background, first you'll want to choose the background image you would like to distribute. In this case, we'll use the nostalgic Windows XP field background. With the following steps we are going to use this background to create the thumbnail required to go along with the image or images you want to distribute.

Now that the background image has been chosen, you'll want to create a new meeting. You can have a meeting with someone, or just create a new meeting in your calendar view with just yourself.
Once you've connected to the meeting, using the ellipse (...) on the control bar at the top, select Apply background effect.
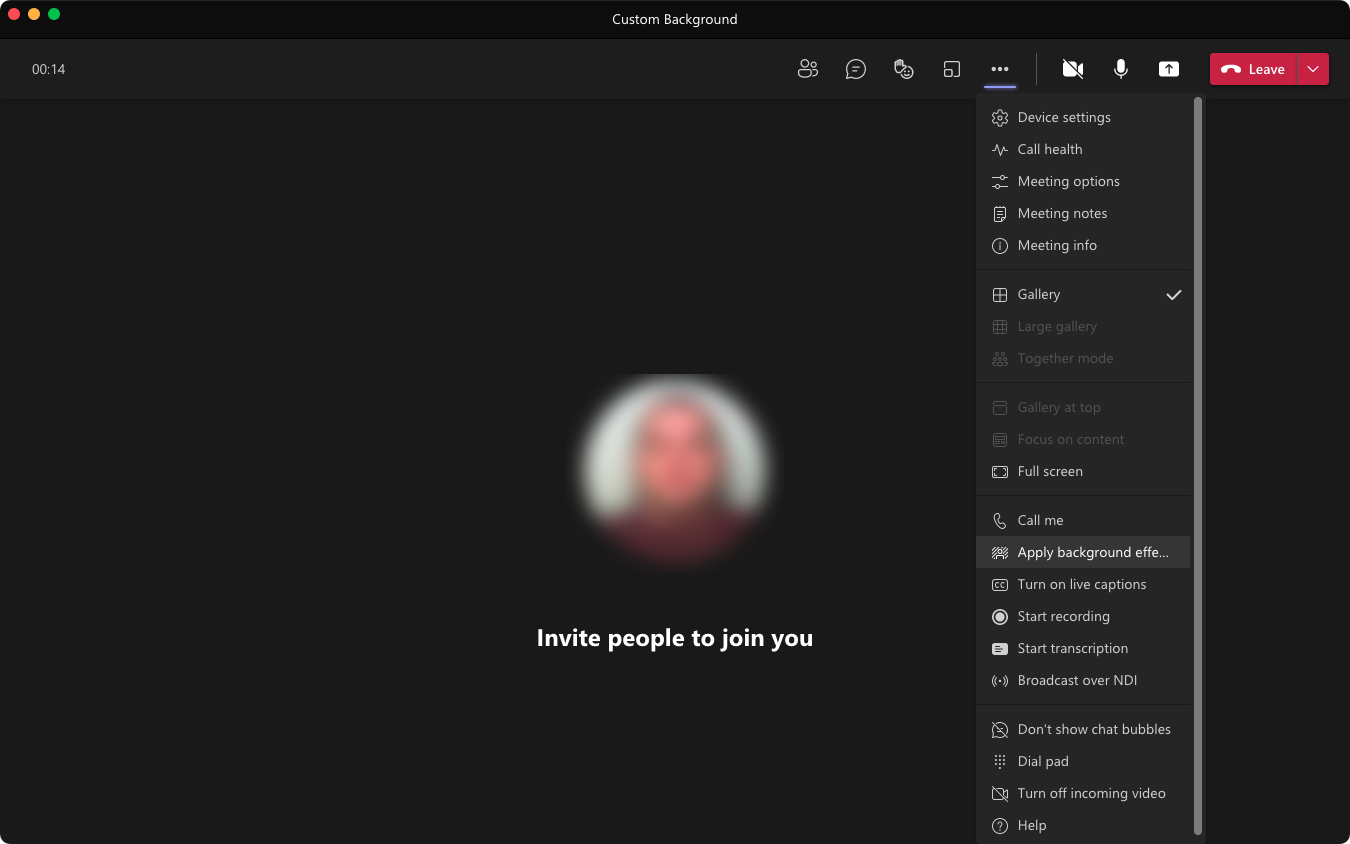
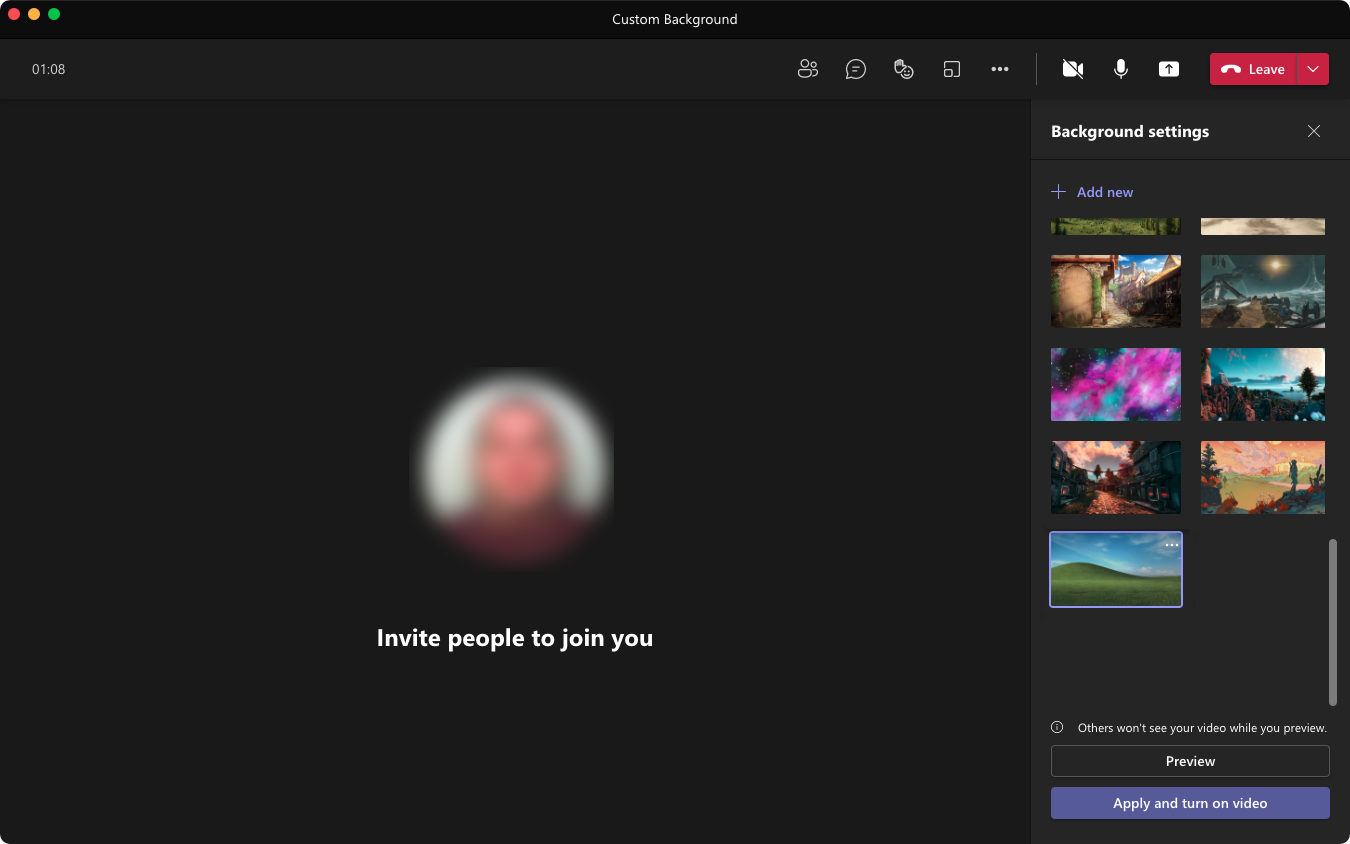
You'll then be given the screen where you can chose an existing background, but in this case we want to use a custom one. By clicking the + Add new button you will be prompted to select your background image.

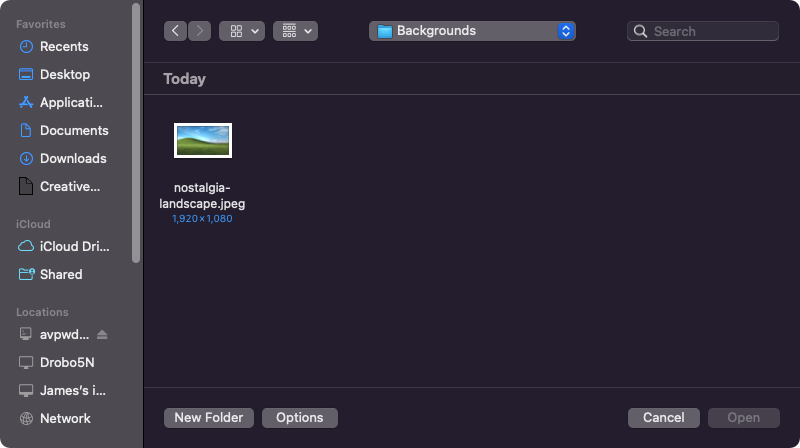
This is where you select the image you want to use and once you click Open the image will then be imported into your Teams backgrounds folder, and will have created a thumbnail file.
You will notice in your list of backgrounds effects you can chose, you should see your new background.
To find the background image or images you are wanting to include in your deployment, browse to the following:
Windows%AppData%\Microsoft\Teams\Backgrounds\Uploads
Mac~/Library/Application Support/Microsoft/Teams/Backgrounds
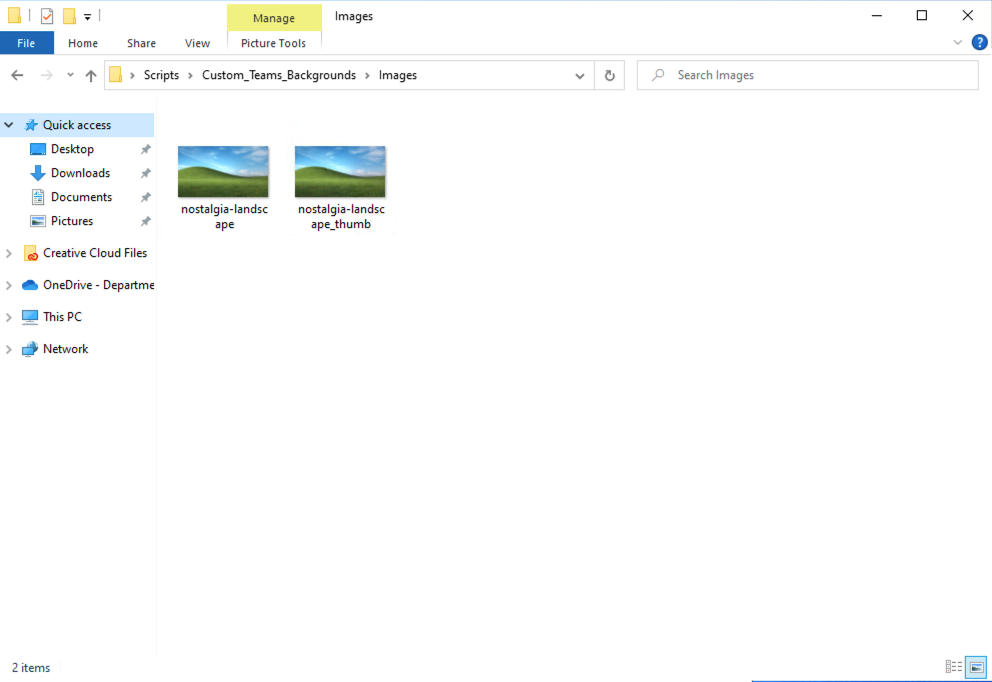
Like the image below, you should see what might appear as a duplicate file, but one ends with the extension _thumb. Grab these 2 (or more, depending on if you are doing multiple backgrounds) files and save them into a new folder, most likely on your desktop. We will use this folder later.
Structure
Ok, now to the meat and potatoes of this whole thing. First off we are going to need to create a folder structure for this.
Using the folder you copied the images to, create a folder within it called Images. Copy those files to this folder.
Using the following script (originally created by Remy Kuster, but modified by me) by creating a new SetTeamsBackgrounds.ps1 file and copying the contents of the following into it. This file should be saved in the parent folder of the Images folder recently created.
Just to clarify, the difference between this version and the one provided by Remy is this utilizes the folder structure with another tool to help create what is needed for your Intune deployment.
# Script to copy companies teams backgrounds to users %appdata%\Microsoft\Teams\Backgrounds.
# Created by: Remy Kuster
# Website: www.tech47.net
# Modified by: James @ Tech47 (12-18-2021)
# Creation date: 01-13-2021

# Create variables

$sourcefolder = ".\Images" # Set the share and folder where you put the custom backgrounds
$TeamsStarted = "$env:APPDATA\Microsoft\Teams"
$DirectoryBGToCreate = "$env:APPDATA\Microsoft\Teams\Backgrounds"
$Uploadfolder = "$env:APPDATA\Microsoft\Teams\Backgrounds\Uploads"
$Logfile = "$env:LOCALAPPDATA\Logs\BG-copy.log"
$Logfilefolder = "$env:LOCALAPPDATA\Logs"

# Create logfile and function

# Check if %localappdata%\Logs is present, if not create folder and logfile

if (!(Test-Path -LiteralPath $Logfilefolder -PathType container))
    {
        try
            {
                New-Item -Path $Logfilefolder -ItemType Directory -ErrorAction Stop | Out-Null #-Force
                New-Item -Path $Logfilefolder -Name "BG-copy.log" -ItemType File -ErrorAction Stop | Out-Null #-Force

                Start-Sleep -s 10
            }
        catch
            {
                Write-Error -Message "Unable to create directory '$Logfilefolder' . Error was: $_" -ErrorAction Stop
            }

    "Successfully created directory '$Logfilefolder' ."
    }
else
    {
        "Directory '$Logfilefolder' already exist"
    }

# Clear the logfile before starting

Clear-Content $Logfile

# Create the logwrite function

Function LogWrite
{
   Param ([string]$logstring)
   $Stamp = (Get-Date).toString("dd/MM/yyy HH:mm:ss")
    $Line = "$Stamp $logstring"

   Add-content $Logfile -value $Line
}

# Check if teams is started once before for current user

if ( (Test-Path -LiteralPath $TeamsStarted) )
    {
        logwrite "Teams started once before by the current user."
    }

else

    {
        logwrite "Teams has never been started by user"
        Exit 1
    }

# Check if %appdata%\Microsoft\Teams\Background is present, if not create folder

if (!(Test-Path -LiteralPath $DirectoryBGToCreate -PathType container))
    {

        try
            {
                New-Item -Path $DirectoryBGToCreate -ItemType Directory -ErrorAction Stop | Out-Null #-Force
            }
        catch
            {
                Write-Error -Message "Unable to create directory '$DirectoryBGToCreate' . Error was: $_" -ErrorAction Stop
            }

    logwrite "Successfully created directories '$DirectoryBGToCreate' ."
    }

else
    {
        logwrite "Directory '$DirectoryBGToCreate' already exist"
    }

# Check if %appdata%\Microsoft\Teams\Background\Uploads is present, if not create folder

if (!(Test-Path -LiteralPath $Uploadfolder -PathType container))
    {

        try
            {
                New-Item -Path $Uploadfolder -ItemType Directory -ErrorAction Stop | Out-Null #-Force
            }
        catch
            {
                Write-Error -Message "Unable to create directory '$Uploadfolder' . Error was: $_" -ErrorAction Stop
            }

     logwrite "Successfully created directories '$Uploadfolder' ."
    }

else
    {
        logwrite "Directory '$Uploadfolder' already exist"
    }

# Check if machine is connected to your corporate network

#$getoutput = (Test-Connection -ComputerName (hostname) -Count 1).IPV4Address.IPAddressToString # process active IP-address
#$getoutput = Get-NetIPAddress -AddressFamily IPv4 | Out-String -stream | Select-String -Pattern "IPAddress" # process IP-address list

# You can multiple adres ranges if your company has got vpn, wireless and physical different subnets.
# This because we don't want to start the copy action from the share if the device is not connected to the corperate network.

#if (($getoutput -like '*192.168.*.*') -or ($getoutput -like '*10.10.*.*') -or ($getoutput -like '*140.*.*.*'))

#    {
#        logwrite "Corporate network detected"
#        $connected="YES"
#    }
#else
#    {
#        logwrite "Corporate network not detected"
#        logwrite "Copy action of uploads folder from share not started"
#        Exit 1
#    }

# copy content from share to teams background location

logwrite "Start copy action of uploads folder from share"
$sourcefiles = (Get-ChildItem -Path $sourcefolder -erroraction SilentlyContinue).Name

if($sourcefiles -ne $null)

{

foreach($sourcefile in $sourcefiles)
    {
        if(!(Test-Path $Uploadfolder\$sourcefile))
            {
                Copy-Item -Path $sourcefolder\$sourcefile -Destination $Uploadfolder\$sourcefile -Recurse -Force
                if(Test-path -Path "$Uploadfolder\$sourcefile")
                    {
                        logwrite "File $sourcefile was copied"
                    }
                else
                    {
                        logwrite "Failed to copy file $sourcefile"
                        Exit 1
                    }
            }
        else
            {
                logwrite "File $sourcefile already exists"
            }

    }
}

else

{
    logwrite "Failed to connect to $sourcefolder "
}
You will need to create another file called Detectfile.ps1 and copy the following into the file. This file should not be kept in the parent folder but just outside of it as we do not need this file as part of the package.
if (Test-Path "$env:APPDATA\Microsoft\Teams\Backgrounds\Uploads\*.jpg") {
    Write-Host "File detected"
}
There is one more tool that you will need and its called IntuneWinApputil.exe which you can find at https://github.com/microsoft/Microsoft-Win32-Content-Prep-Tool/releases/tag/1.8.3.
This file should be saved just outside the parent folder (along with the Detectfile.ps1). What this tool does is take your image folder and the SetTeamsBackgroupd.ps1 script and combines them into an .intunewin file that you can upload to Intune. The steps for that will follow.
Open a command prompt and browse to the location where you have the IntuneWinAppUtil.exe saved to. Run IntuneWinAppUtil.exe and follow the prompts. I have provided my inputs as examples but you will have to change some of it to make it work.
C:\Users\Tech47\Desktop\Scripts>IntuneWinAppUtil.exe
Please specify the source folder: C:\Users\Tech47\Desktop\Scripts\Custom_Teams_Backgrounds
Please specify the setup file: SetTeamsBackgrounds.ps1
Please specify the output folder: .\
Do you want to specify catalog folder (Y/N)? N
Your main inputs are Please specify the source folder: which should contain the location of the folder where the SetTeamsBackgrounds.ps1 file is located. In this case its C:\Users\Tech47\Desktop\Scripts\Custom_Teams_Backgrounds.
For Please specify the setup file: you specify the file you want it to utilize to initiate the process, so input SetTeamsBackgrounds.ps1.
You can specify a specific output folder but I use .\ to save it in the location where the IntuneWinAppUtil.exe is located to make it easier to locate.
For the Do you want to specify catalog folder (Y/N)? I use N as we don't have a use for it in this case.
Once you finish that it will take a few seconds and generate the file. Well done! You have now created your package that you will then distribute through the Microsoft Endpoint Manager (essentially Intune) to allow you to distribute to your tenant.
Deployment
Ok, now that we have our SetTeamsBackgrounds.intunewin file its time to create the Intune deployment.
First, log into your Endpoint Manager admin portal and click on Apps. Since this deployment is for Windows, under the By platform option in the side blade, click Windows.
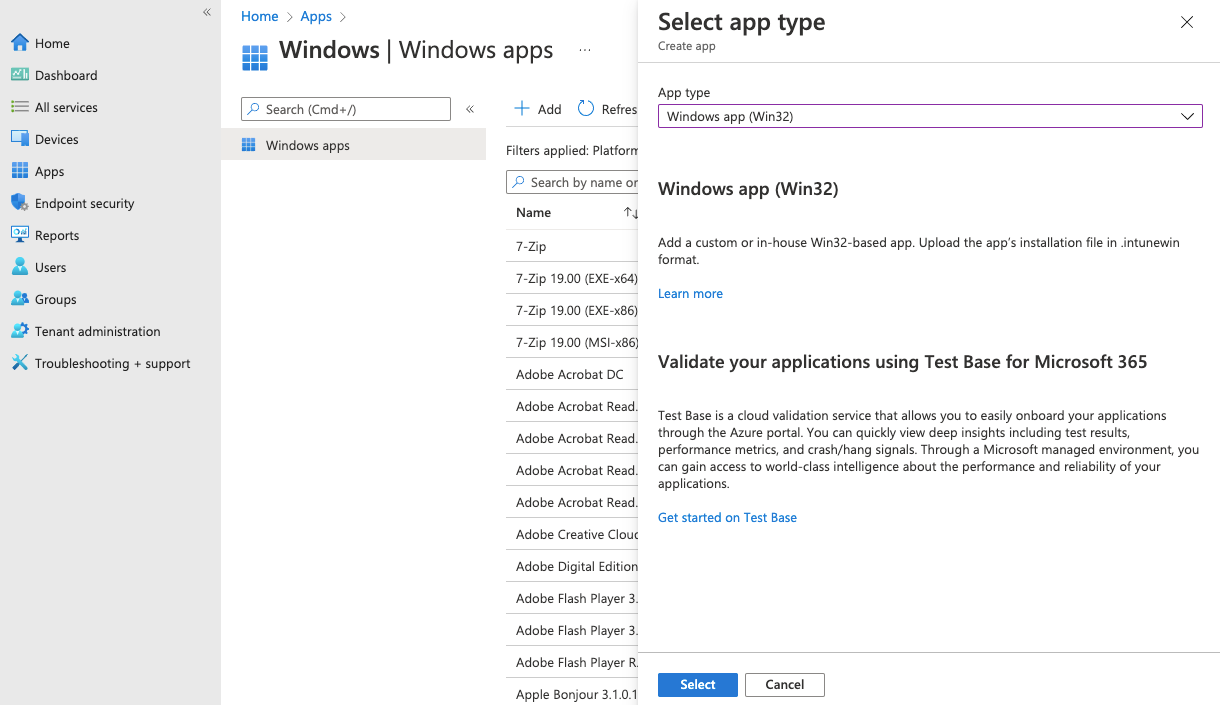
Once you've selected Windows, click + Add in the ribbon on top. In the new blade to the right, you should see a drop down with many options, select Windows app (Win32) and click Select.
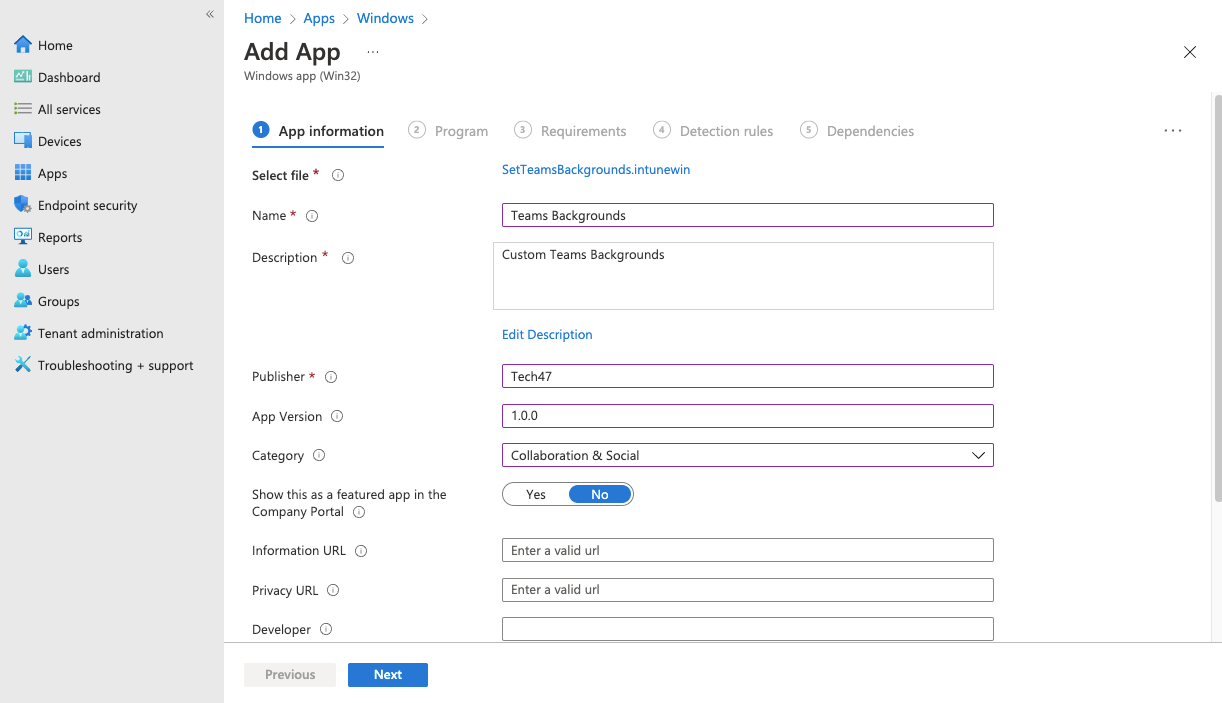
You will be prompted for App information which will require you to select a file. Click Select app package file and browse to where you created the SetTeamsBAckgrounds.intunewin file. Once its added you should see the Name, Platform, Size and if MAM is Enabled. Once you verify this, click OK.

The screen will change and you will be asked to fill in the Name, Description, Publisher, App Version, etc. This is all per your requirements of what you would like this App to do. In this specific deployment we set it up to assign it to All users so we set Show this as a featured app in the Company Portal to No. Once you've filled this out, click Next.
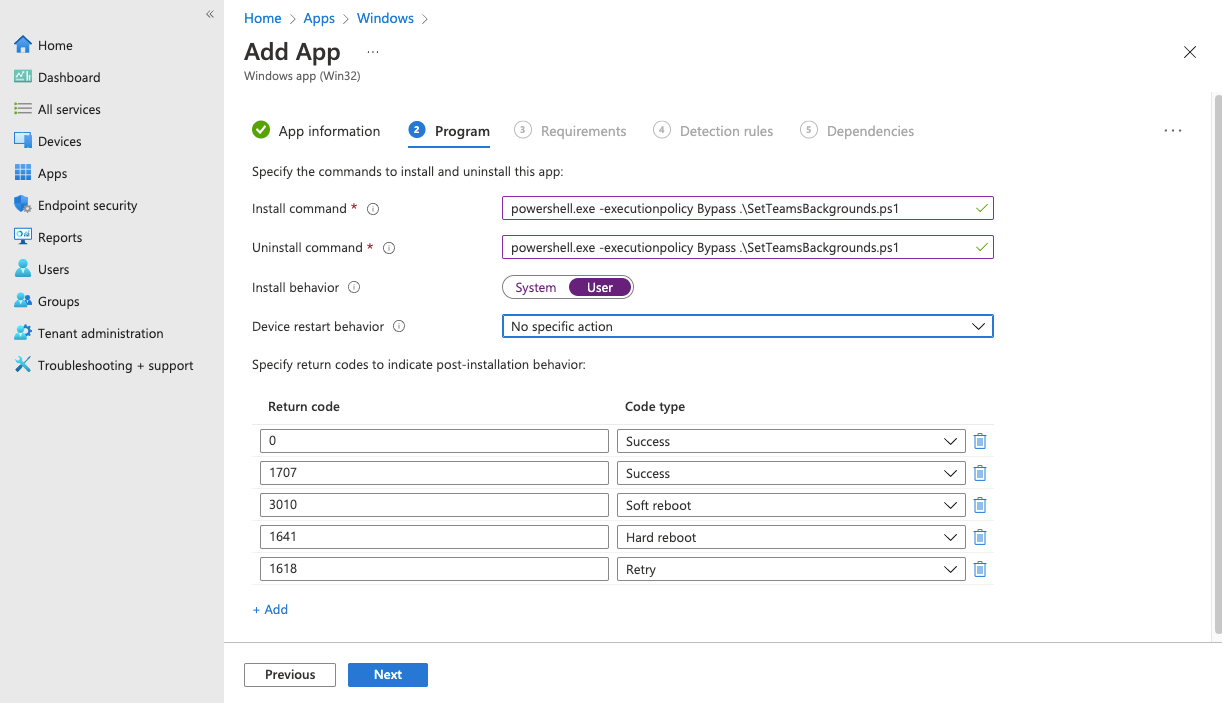
In the Program tab, you will be asked to include the Install command and Uninstall command, which in this case is the same thing.
Put in the following:
powershell.exe -executionpolicy Bypass .\SetTeamsBackgrounds.ps1For Install Behavior set it to User.
Since there is no restart needed, set Device restart behavior to No specific action. Unless you have added or changed anything, the Return codes are correct, you can click Next.
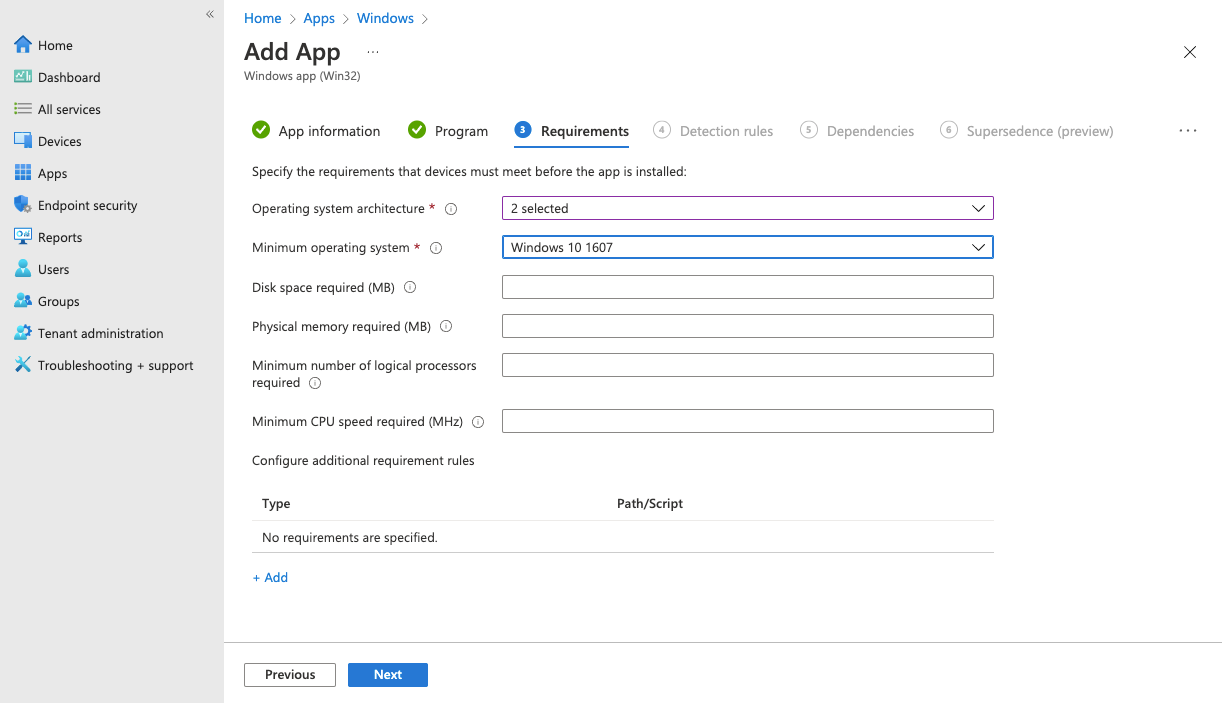
Under Requirements you must set the Operating system architecture and the Minimum operating system in order to proceed. Once you have completed this, click Next.
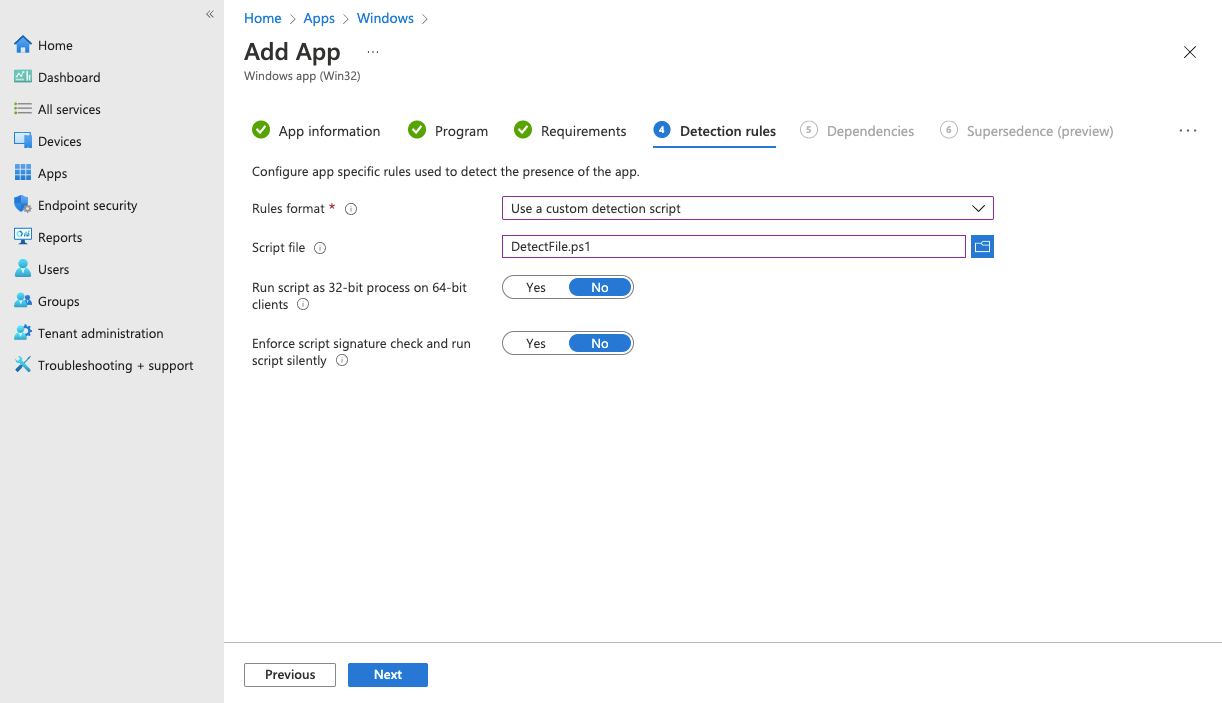
For Detection rules, we will use the DetectFile.ps1 script we created. For Rules format select Use a custom detection script from the drop down, and for Script file, Click the browse button to the right and find the file and open it. Leave the other questions on No, then click Next.
For our purposes, the next to tabs, Dependencies and Supersedence will not be used so you can skip those and click Next.
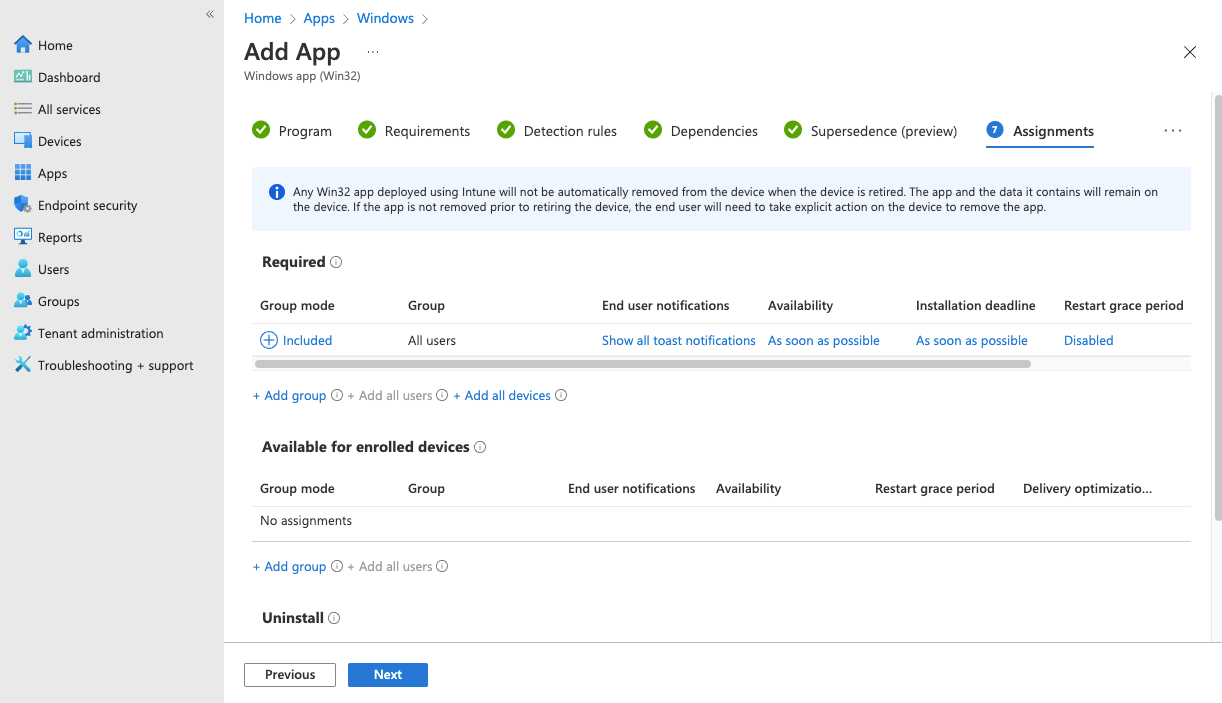
For Assignments, you will need to determine how you want it to be deployed. In our case, we are setting it as Required and clicking the + Add all users option under Required. It will create a line and you can adjust these options, but again for the purpose of this deployment we will keep them default. When this page is completed, click Next.
You will now be brought to the Review + create tab where you can verify that all your settings are correct. If something doesn't look right, either click Previous or click on the tab heading and it will take you back to that section. Once you have verified it, click Create.
The create process could take a little bit of time to process but once its complete, just sit back and wait for the deployment to happen. It does not deploy instantly, but give it some time and you should start to see the deployment happen.
Hopefully this tutorial helped you in getting your Custom Teams backgrounds deployed to your tenant. If you have any questions, feel free to reach out to me through Discord or by Twitter.